

How To Blance Background Noise
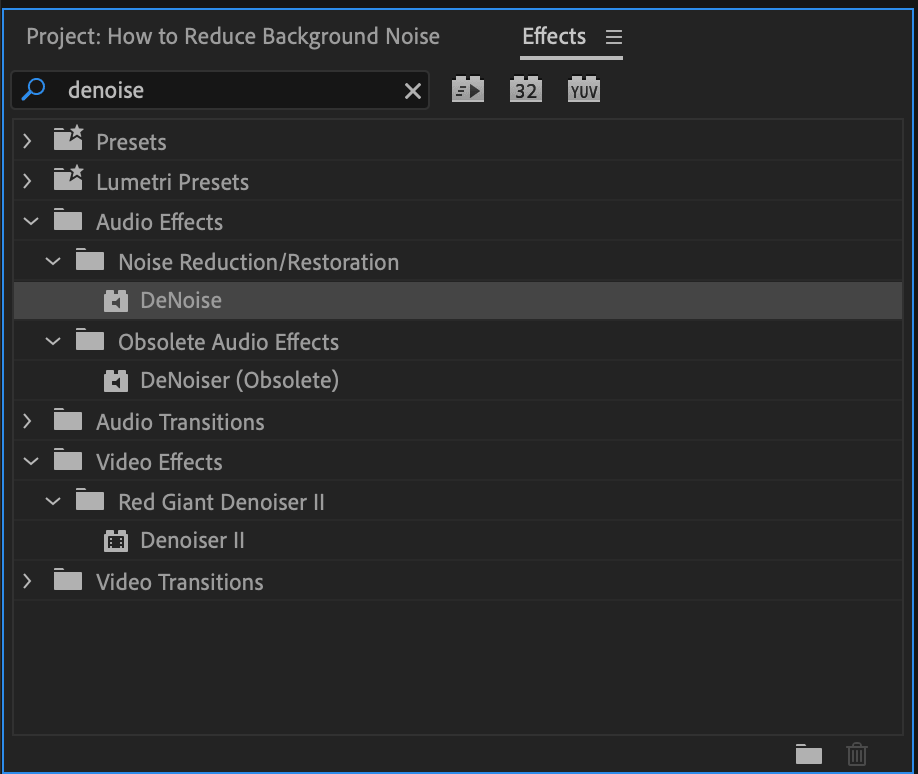
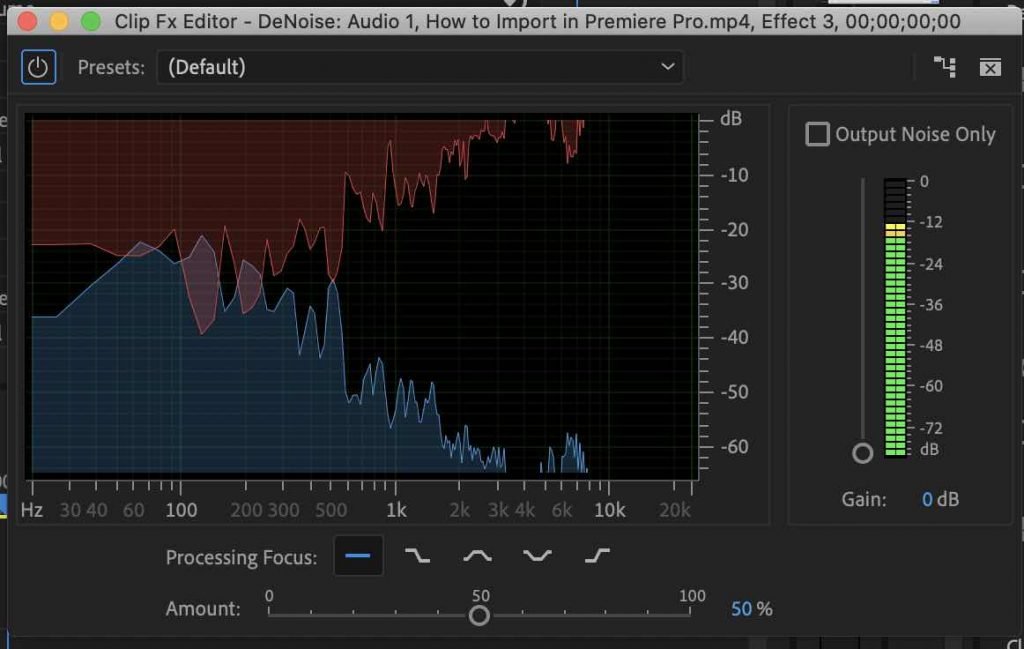
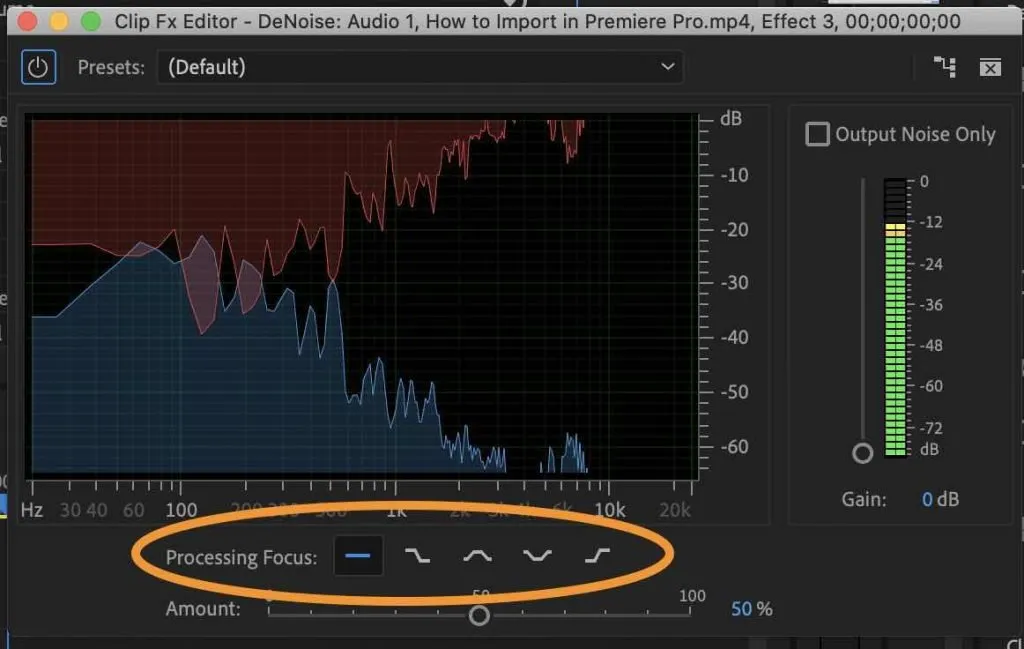
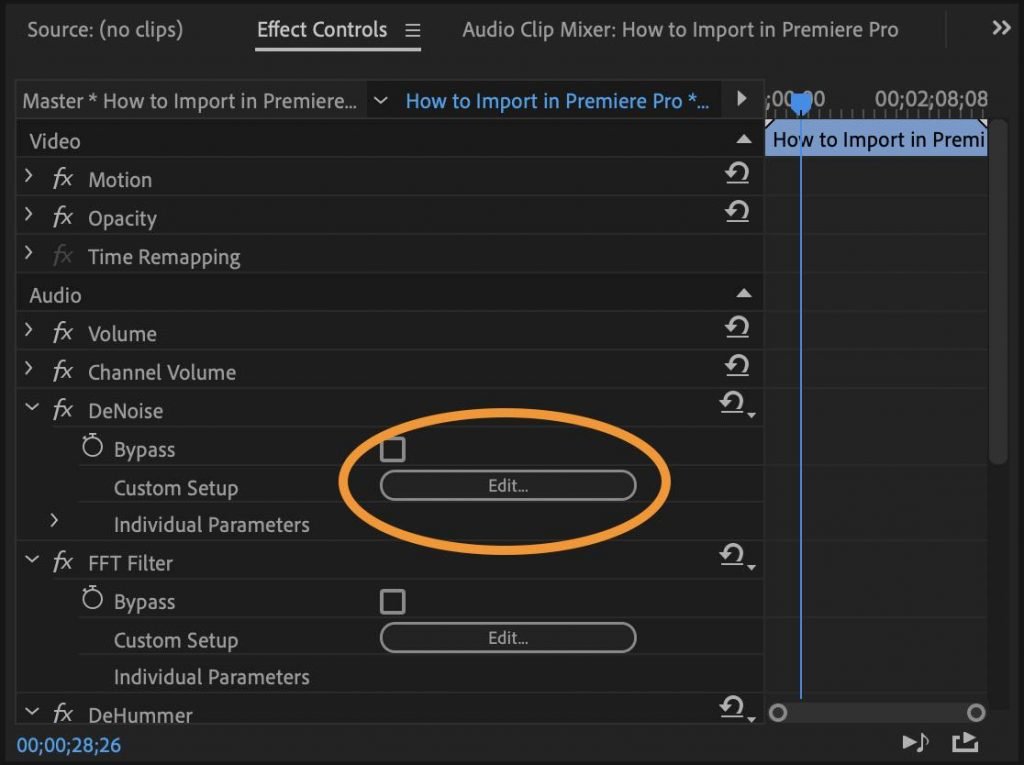
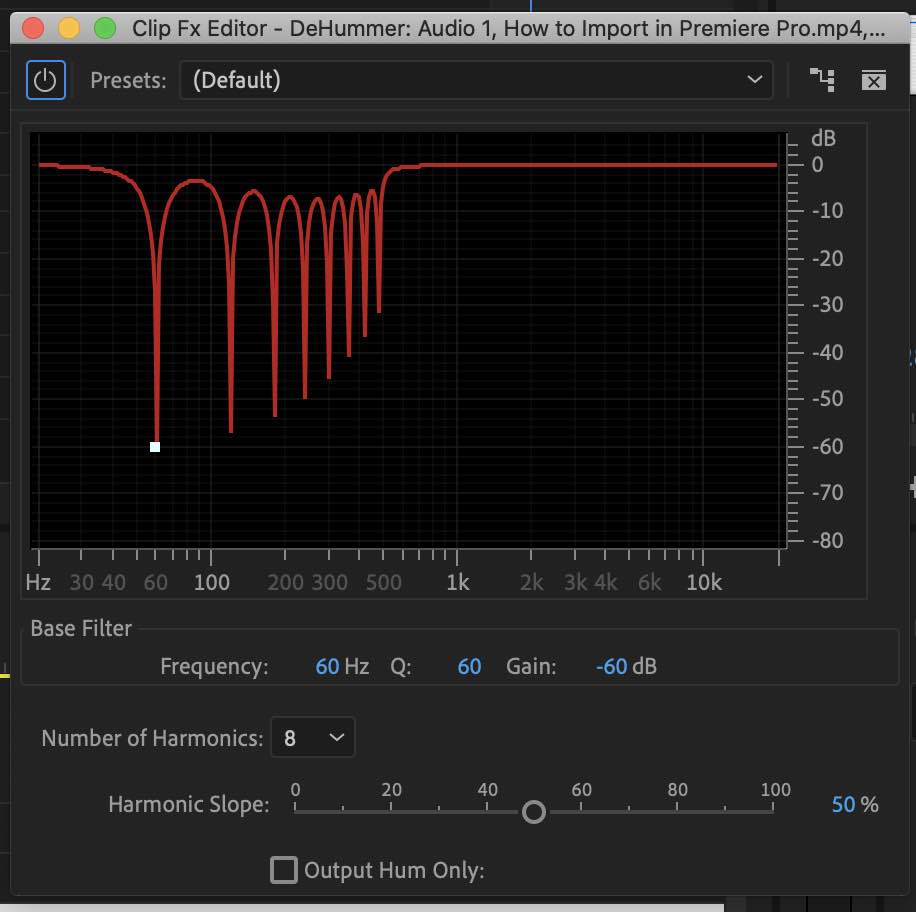
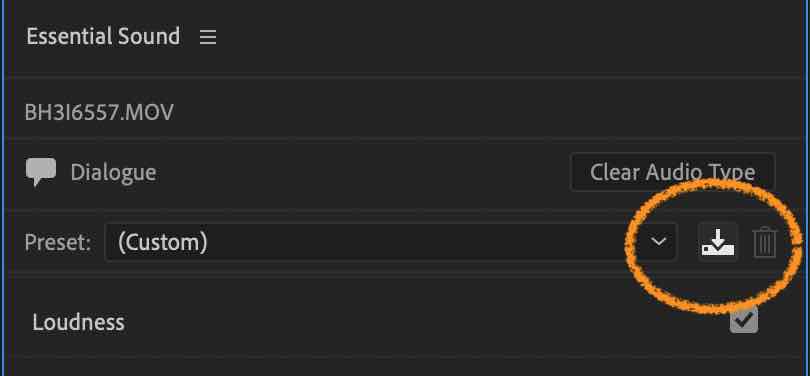
This post does incorporate Amazon product recommendations. As an Amazon associate, I receive compensation for qualifying purchases, still any commission that I earn comes at no cost to y'all. Ask any video editor and they tell you that audio quality is even more than important than visual quality. This may sound surprising at first, just it's true. Although sound quality isn't something we can see with our eyes, we pick up on information technology right away when sound quality is bad. Even with pristine video quality, heavy background noise in the form of air conditioning, reverb from an echoey room, or other hissing and buzzing sounds in the background can exist very distracting. While eliminating background noise is best done while recording, nosotros all know this isn't always possible. Thankfully, Premiere Pro has developed some great tools to help united states reduce groundwork racket in our videos during postal service-processing. By the way, I just bought a new USB mic to record sound for my YouTube videos that doesn't break the upkeep and I'm LOVING it. The quality has blown me away. In case you're curious, here information technology is. In today'southward post, nosotros'll walk through just how easy it is to reduce ambient background noise in your video using Adobe Premiere Pro. There are two principal means to reduce noise through Premiere Pro. I'll walk you lot through both methods and when you may desire to use one over the other. Why apply this method? It's the most straightforward and intuitive way. Information technology will handle 95% of most audio edits that you lot may need to use. First, you lot'll want to make sure that you've opened the Essential Sound Panel in Premiere Pro. If yous don't see information technology in your editing window, so navigate up to 'Window' -> 'Essential Sound' and ensure that it is checked. You should now meet a panel that looks like this: Select all the audio clips (1 or more) in your timeline that y'all'd like to edit. Now click 'Dialogue' in the Essential Audio Console. Your Essential Sound Console will now look similar this: Click on the tab that says 'Repair' and you'll see the post-obit options: Check the first option 'Reduce Noise' to reduce these types of background noise. Premiere Pro does a great job at isolating those low ambient noises to become rid of common noises produced from ac, lights, etc. Once you've checked this selection, use the slider to suit the amount of the effect that you'd similar to utilize. As y'all play the audio clip dorsum in your timeline, you lot can accommodate the amount of effect in existent time. Listen to decide the correct corporeality. Beginning pocket-sized and increase gradually. You'll notice that the more of the effect you apply, the less natural the vocalization will sound equally well. It'due south of import to notice the right residuum here. Remember that less is more and start with less than you think you may need. Tip: I make first round adjustments, work on something else for a while, and then come up back to tweak these adjustments over again. I find that my ears volition accept a more fresh take on how things sound the 2d time around. The next option you'll detect is the 'Reduce Rumble' effect. If you lot have an adventitious bump against a microphone or the microphone is scratching against skin or clothing, this would be the affect you lot'll want to try. If you have loud, rumbling wind noise in the background, apply this outcome likewise. Apply it to your clips by clicking the check mark while your sound clip is selected. Now begin playing back your audio clip and adjust the sliders as you mind to eliminate as much of the noise every bit possible. Check the DeHum event in gild to go rid of abiding, low frequency noises in the background. These types of noises are oftentimes caused by electric cords or equipment causing low frequency tones in the background. Employ this effect the same way as the others. Cheque to utilize the event and so apply the slider to decide how much or how little to apply to your clip. Cheque the DeEss parameter to eliminate those harsh south sounds sometimes caused by very sensitive or besides closely places microphones. If you don't have sound absorbing panels or you're recording in an environment that is broad open with lots of exposed windows or walls, no matter how great your mic is, you lot may meet some unwanted reverb on your audio track. This tool is very helpful at reducing the echo and reverb picked up on that microphone and giving your sound a warmer and more professional tone. Using these fundamental Essential Sound console options should eliminate well-nigh ambience background noise from your audio clips, however if you are still hearing distracting racket and desire to isolate even more than groundwork dissonance, move on to method 2. With the next method we'll walk through a more detailed approach that tin isolate fifty-fifty more than background dissonance in your clips. If method ane using the Essential Audio Console window solves your groundwork noise issues, and then you lot can end there. It'south a great tool and so easy to use. Merely in reality, there are times when you may have drastic groundwork dissonance and you lot demand some extra tools to help you get rid of it. There are more tools at your fingertips within Premiere Pro that can help y'all isolate even more groundwork racket, even beyond using the simple sliders found within the Essential Audio Panel. one | With your audio clip selected in the timeline, open up the effects panel. two | Type in 'Denoise' in the effect console search box or navigate to 'Sound Effects' -> 'Dissonance Reduction/Resoration' and select 'Denoise'. 3 | Drag this effect onto the clip or clips that you'd similar to adjust. 4 | Navigate up to the source window and select the 'Outcome Controls' tab. 5 | Click 'edit' and you'll run across another window open up. Every bit you play your clip back, you lot'll hear and encounter the waveforms moving with your audio clip. The bottom slider will control the total corporeality of this effect that you'd similar to employ to your clip. You'll see in this window that in that location are additional options - you lot can isolate which frequencies you lot'd similar to effect - high, low, or mid. You can also command the overall gain (or sensitivity) of the audio. Equally you play back your audio, experiment with these different adjustments to find what works best for your clip. Once you lot've applied any of the furnishings in the preset sound effects panel, navigate over to the furnishings window and click 'edit'. Some other window will open up showing you several more than specific parameters that you can control for each effect. Although this may seem complicated, it's a great tool if you'd like to get even more specific with your sound edits. If the Essential Sound Panel fixes your groundwork noise, and so stick with it. It'due south a peachy tool. However, if yous want to really dig deeper to isolate a specific sound, it's nice to know exactly where you tin can find more controls in club to do and then. Let's say that you've made all the necessary adjustments to your clip and you're happy with how it sounds. What if you lot desire to apply this effect to more clips within your timeline? The easiest and quickest mode to practice this is by creating a custom preset that you can apply to any clips you'd like with a single click. It'due south also a great feature to take if you'll be using a similar studio or setup in the future and want to save these settings for future videos. 1 | In the Essential Sound Panel, click on the little icon to the correct with an pointer pointing downwards. ii | Name your preset equally you wish and hit ok. 3 | Select all the clips that you lot'd like to apply the consequence to and open up the drib downwards preset window in Essential Sound. Find your custom preset and click information technology. That's it! All of your selected clips will at present have your custom preset practical to them. Just a annotation that I know and understand how frustrating it can be try and isolate annoying background racket. And although Premiere Pro has made some incredible advancements in this engineering science, there are still going to be times when it'southward merely tough. Get out me your questions/solutions all nigh removing groundwork noise in the comments below. I love learning other methods from you all and helping solve specific problems and questions whenever I can. -Beth
Method one | Reduce Groundwork Noise Using the Essential Sound Panel
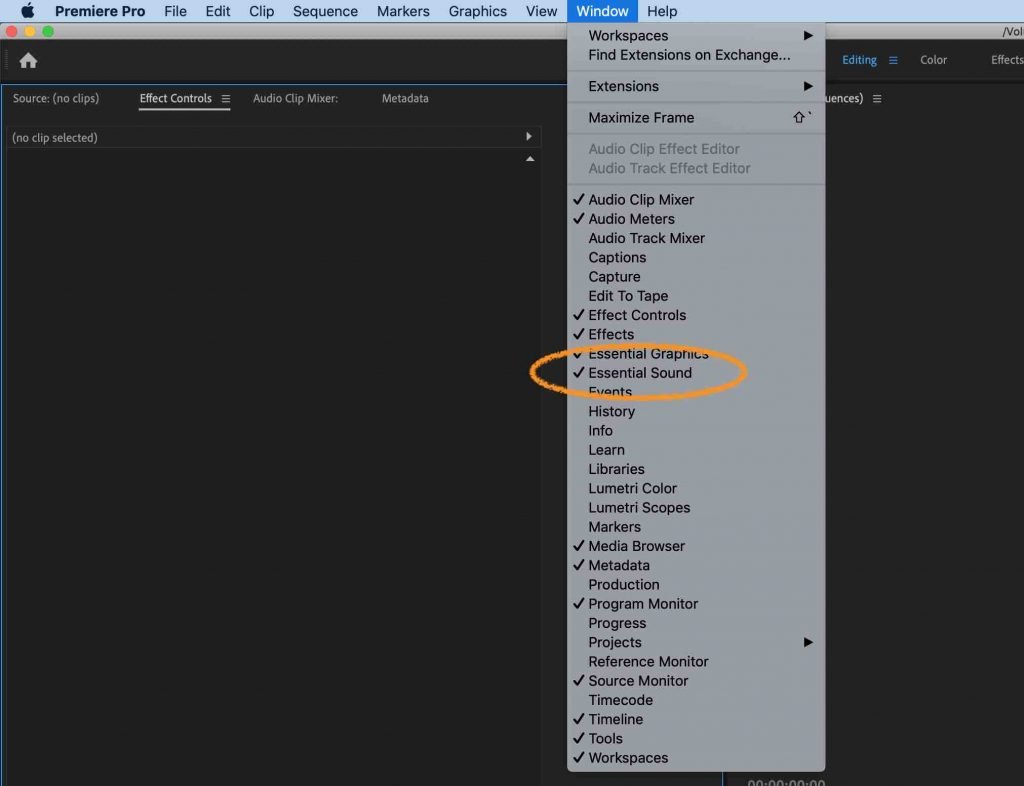
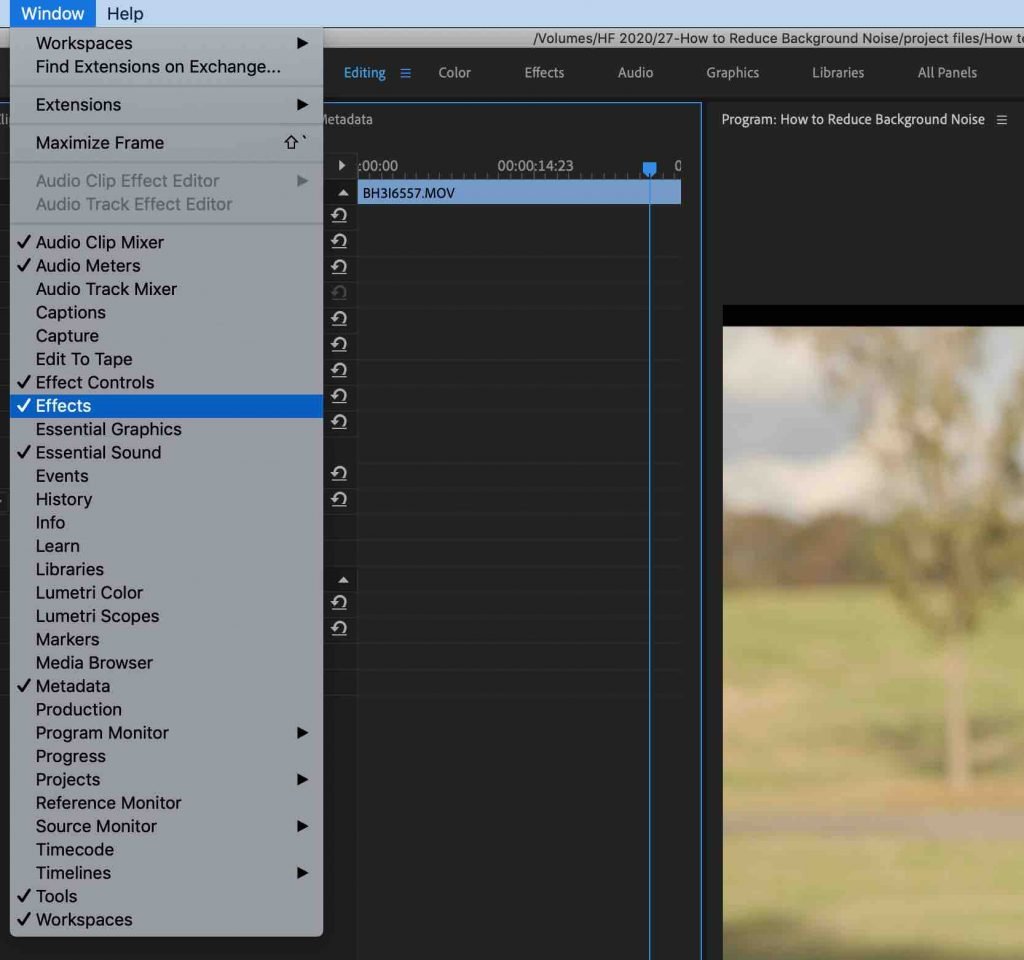
Stride 1 | Open Essential Sound Console
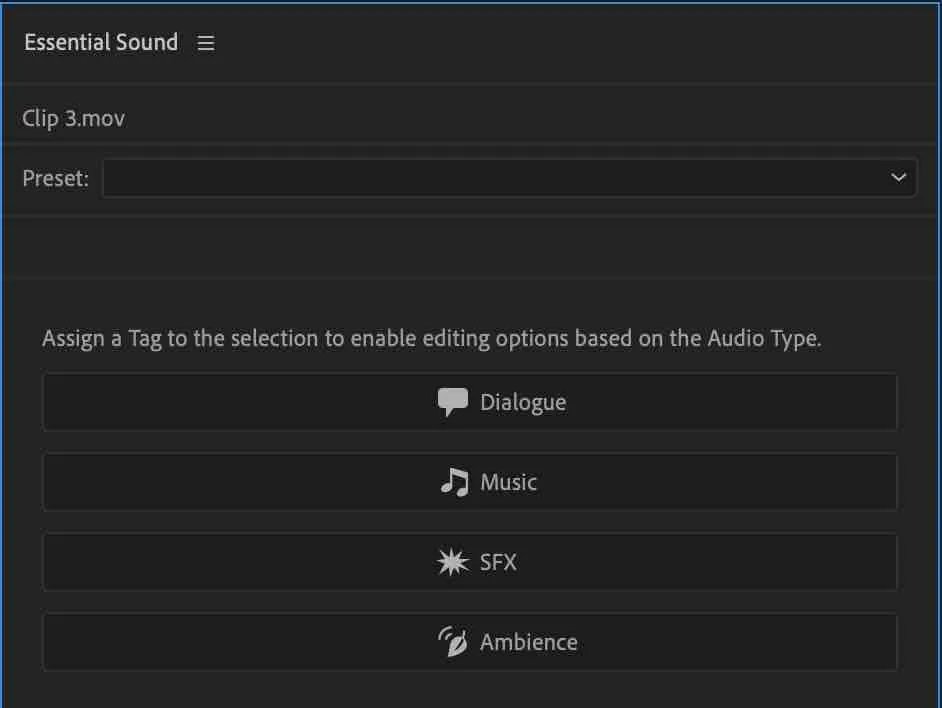
Step 2 | Designate Your Clip As Dialogue
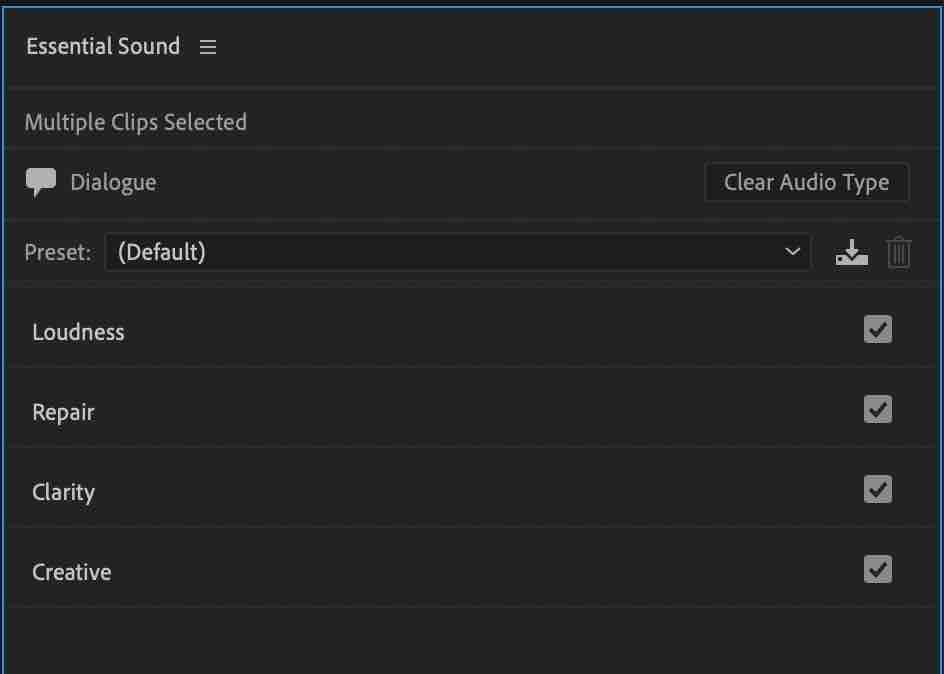
Pace 3 | Open the Repair Tab in Essential Audio
![]()
Pace 4 | Utilise the Sliders to Adjust the Amount of Dissonance Reduction
Reducing groundwork noise in the course of air workout or other ambient sounds.
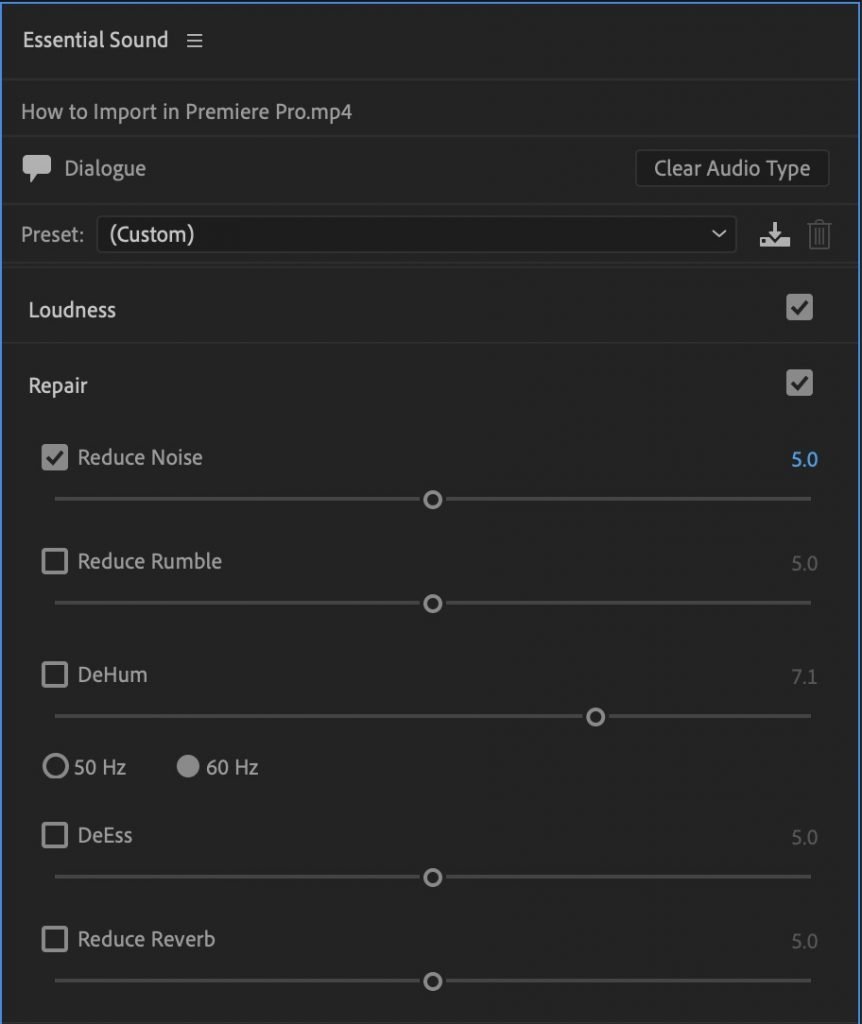
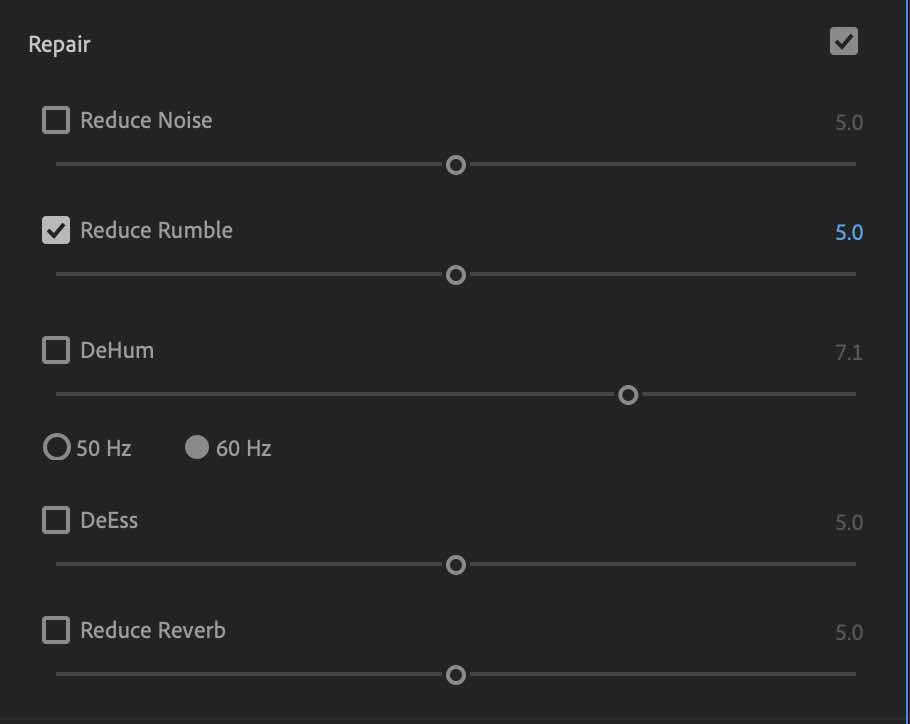
Reducing background noises caused from wind noise, equally well as bumps or scratches against the microphone.
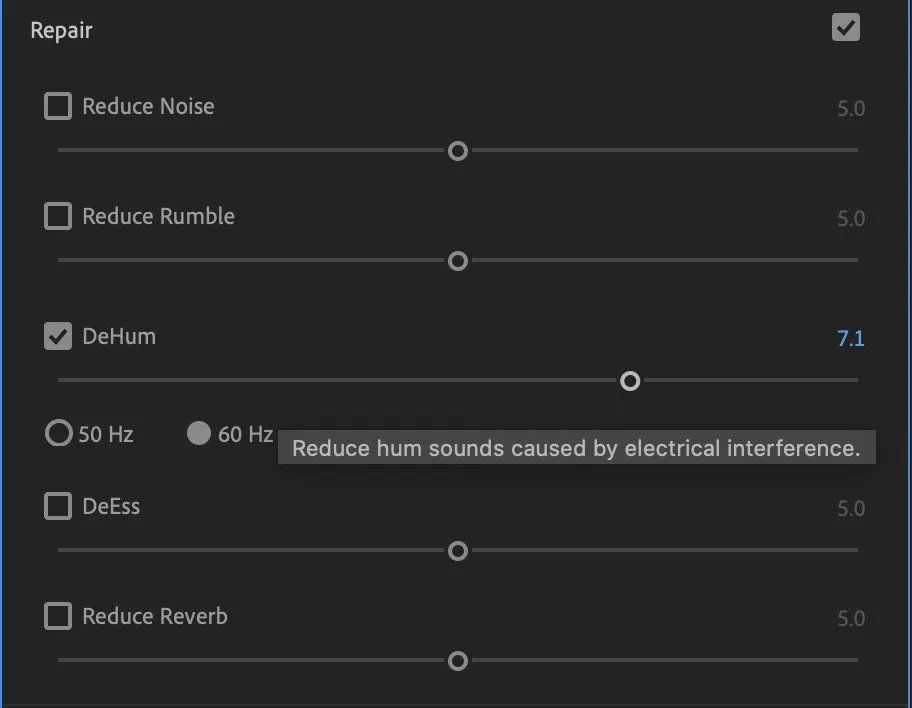
Reducing low frequency hum noises from machines or other background sounds.
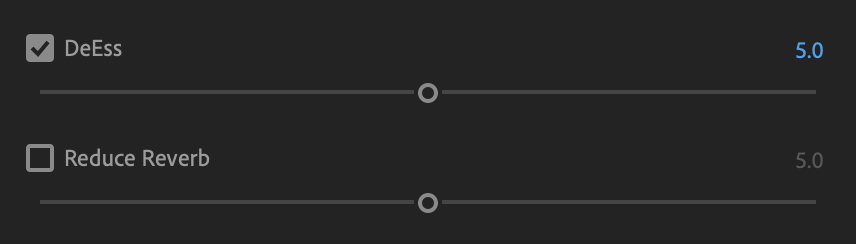
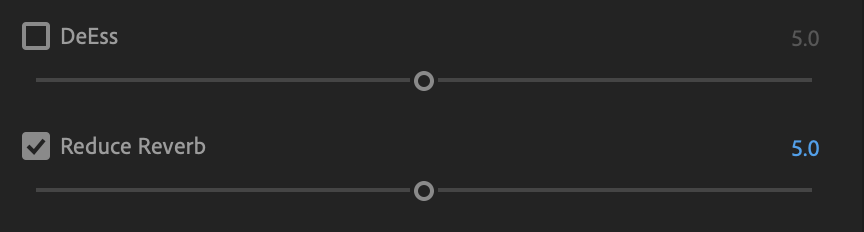
Reducing Sibilance or Distracting 'S' Sounds
Reducing Room Echo in the Background
Method 2 | Reduce Background Noise Using the Effects Console

Note: This works with whatever of the preset sound effects that you utilize via the Essential Sound Panel window.
Creating an Essential Sound Preset to Apply to All Your Audio Clips
Terminal Thoughts

How To Blance Background Noise,
Source: https://www.handcraftfilms.com/blog/reduce-background-noise-premiere-pro/
Posted by: rathcatill.blogspot.com
0 Response to "How To Blance Background Noise"
Post a Comment